Tools & marking cuts
Unfolder has two separate toolbars: one for the 3D view, one for the flattened pattern layout. They stay in sync — cut an edge in either place and the other updates immediately.
In the 3D view
| Tool | What it does |
|---|---|
| Select | Click an edge where two faces meet to toggle it between folded and cut. A boundary edge (only one face touches it) can't be toggled — it's always a cut. |
| Measure distance | Click two points — a vertex, or anywhere along an edge — to measure the real-world distance between them. |
| Measure model size | Shows the model's own extent from its lowest to highest point along each axis. |
| Scale one part | Rescale a single disconnected part on its own. Only available for parts that share no surface with the rest of the model, so resizing one never changes how the others fit together. |
| Subdivide | Refines a curved part modeled with too few facets into more, smaller ones that approximate the curve better — rather than being stuck with the source file's original polygon density. |
| Paint groups / Eraser | Drag across the model to mark faces that should end up in the same flattened piece, no matter what the cut algorithm would otherwise choose. Painting a new area starts a new color; touching an already-painted area joins it; connecting two differently colored areas merges them into the older one. Tag a group with a material so its faces always stay separate from any differently tagged (or untagged) area. |
| Preview assembly | Animates the flat pattern folding back up into the real shape, so you can check how the pieces go together before printing. Click a part to preview just that one. |
| Place | Only shown when a project combines more than one uploaded file. Drag each part's gizmo — a colored arrow to move along one axis, a small square to move along a plane — to position it relative to the others. |
Clicking to re-fold an edge that would just close a loop within an already-joined piece doesn't get rejected — Unfolder automatically cuts the next-sharpest edge along that same loop instead, so the click always does something.
In the pattern layout
| Tool | What it does |
|---|---|
Select (M) |
Drag a piece to reposition it, or drag empty space to box-select several at once. Click a fold line to cut it apart — to undo that, drag the piece back onto the neighbor it was originally cut from, rather than clicking again. |
Pan (H) |
Drag anywhere to move the view. |
Rotate (R) |
Drag a piece or selection to spin it around its center, for tighter page packing. |
Shift-click or Shift-drag adds to the current selection. Overlapping pieces are highlighted in red so a packing problem is never silent. Cuts you make here are saved automatically, and show up back in the 3D view immediately — there's no separate "apply" step.
Group or lock a multi-piece selection from the Edit menu so they move together (or don't move at all) while you arrange the page. Turn on Show edge numbers (View menu) to label matching cut edges across pieces — useful once a model has enough pieces that it's not obvious which edge glues to which.
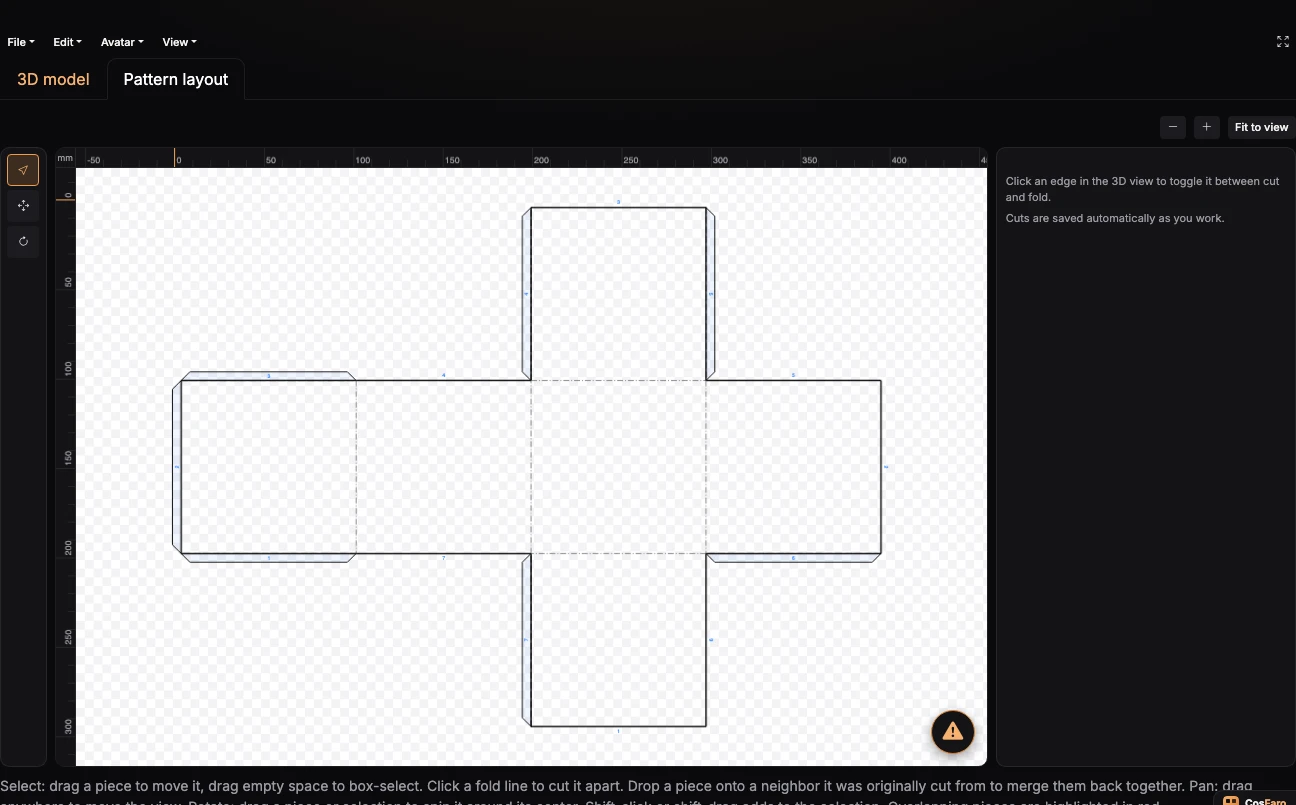
Fig. 1 — A cube fully cut apart into its flattened cross-shaped pattern layout, with the three previously-cut edges now shown as gaps between separate pieces
Every glue tab can be dragged to the other side of its shared edge, or reset back to whatever height/angle/side you've set globally in Preferences.